How to inject reta peptide correctly starts with proper preparation, not just the injection itself.
Before administration, the lyophilized powder must be reconstituted, handled using sterile techniques, and measured accurately.
Whether you’re learning how to use reta peptide powder, reviewing reta peptide mixing instructions, or understanding how to inject reta peptide, this guide covers every essential step for safe, consistent, and reliable research environments
What Is Reta Peptide?
Reta peptide, also known as Retatrutide, is an investigational research peptide studied for its effects on metabolic pathways. It functions as a triple receptor agonist, targeting the GLP-1, GIP, and glucagon receptors, making it a significant focus of ongoing metabolic research. For a broader overview of preparation, handling, and storage, read our guide on how to use reta peptide.
Its research mechanism involves interaction with:
| Receptor | Primary Research Focus |
| GLP-1 receptor | Glucose regulation and appetite signaling |
| GIP receptor | Energy metabolism and insulin response |
| Glucagon receptor | Energy expenditure and metabolic regulation |
Because these three pathways work together, researchers continue investigating how this peptide may influence metabolic processes in controlled research environments.
Why Does Reta Peptide Come as a Powder?
One of the most common questions is why reta peptide is supplied as a dry powder instead of a liquid solution. The reason is peptide stability—lyophilized peptides remain more stable during storage, while dissolved peptides are more susceptible to degradation from heat, moisture, light, and contamination.
- Moisture
- Heat
- Light exposure
- Oxidation
- Microbial contamination
To improve stability during storage and transportation, manufacturers commonly produce peptides through a process called lyophilization, also known as freeze-drying.
During lyophilization:
- Water is removed from the peptide.
- The molecular structure is stabilized.
- Shelf life is significantly extended.
- Storage becomes more practical before reconstitution.
This is why reta peptide is generally supplied as a dry powder that requires mixing before use.
Benefits of Lyophilized Peptides
| Benefit | Explanation |
| Improved stability | Dry peptides remain more stable than liquid preparations. |
| Longer shelf life | Properly stored lyophilized peptides maintain quality for extended periods. |
| Easier transport | Freeze-dried products tolerate shipping better than pre-mixed solutions. |
| Flexible preparation | Researchers can prepare solutions according to laboratory protocols. |
The freeze-drying process does not activate or alter the peptide. Instead, it preserves its structure until reconstitution.
How to Use Reta Peptide Powder
Before learning how to use reta peptide powder, it’s helpful to understand what reta peptide is and why it is supplied as a lyophilized powder rather than a ready-to-use solution.
Before administration, researchers generally perform several preparation steps under sterile conditions.
These include:
- Inspecting the vial
- Verifying product labeling
- Preparing a clean workspace
- Using sterile bacteriostatic water (when appropriate)
- Reconstituting the powder carefully
- Inspecting the final solution
- Measuring the required volume accurately
- Preparing the syringe for subcutaneous administration
Each stage contributes to preserving peptide quality throughout the handling process.
Skipping preparation steps or using improper techniques can negatively affect:
- Solution clarity
- Peptide stability
- Measurement accuracy
- Laboratory consistency
- Overall research quality
For this reason, preparation is considered just as important as the injection itself.
Understanding the Reconstitution Process
Before learning reta peptide how to mix, it’s important to understand what reconstitution means. Reconstitution is the process of adding a sterile diluent to lyophilized reta peptide to create a clear solution while preserving peptide stability.
A properly reconstituted solution should be:
- Clear and colorless
- Free of visible particles
- Evenly mixed
- Suitable for accurate measurement
Handle the vial gently during preparation. Avoid shaking it, as excessive agitation may affect peptide integrity.
Equipment Needed Before Mixing and Injecting Reta Peptide
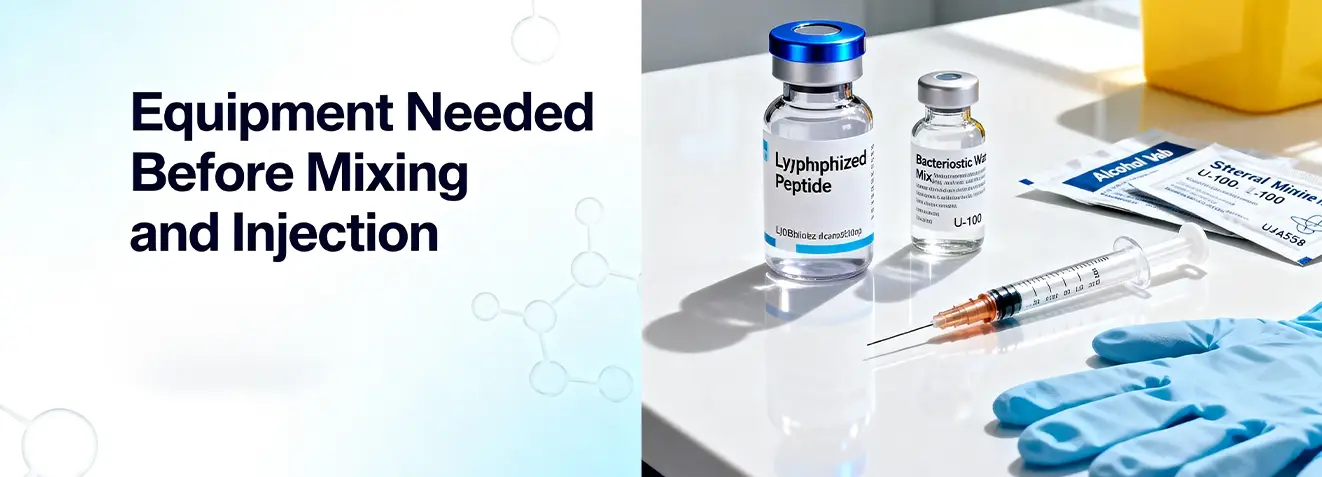
Having the correct equipment prepared beforehand helps maintain sterility and improves workflow efficiency, which is also recommended when handling other GLP-1 peptide research.
The following items are commonly used during peptide preparation.
| Equipment | Purpose |
| Lyophilized reta peptide vial | Contains the freeze-dried peptide |
| Bacteriostatic water (when applicable) | Used for peptide reconstitution |
| Sterile mixing syringe | Transfers diluent into the peptide vial |
| U-100 insulin syringe | Measures the prepared solution accurately |
| Alcohol swabs | Disinfect vial stoppers and the injection site |
| Disposable gloves | Reduce contamination risk |
| Clean laboratory surface | Maintains aseptic handling |
| Sharps container | Safe disposal of used needles |
Creating a Clean Preparation Environment
Even small contaminants introduced during preparation can affect peptide quality.
Before handling reta peptide, prepare a clean workspace by following basic laboratory hygiene practices.
Recommended preparation steps include:
- Wash hands thoroughly.
- Clean the work surface.
- Organize all equipment before opening any vial.
- Minimize unnecessary handling.
- Disinfect rubber vial stoppers using alcohol.
- Allow alcohol to dry completely before inserting a needle.
- Avoid touching sterile needle tips or rubber stoppers after cleaning.
Maintaining aseptic technique throughout the process reduces opportunities for contamination and helps preserve solution quality after reconstitution.
Reta Peptide Mixing Instructions: How to Reconstitute the Powder Correctly
Understanding reta peptide mixing instructions is essential for preparing a stable peptide solution. Proper reconstitution helps preserve peptide integrity, ensures accurate measurement, and supports consistent controlled studies.
Before starting, remember these key principles:
- Maintain sterility throughout the process.
- Handle the vial gently.
- Measure all liquids accurately.
- Refrigerate the peptide after reconstitution.
Reta Peptide How to Mix: Step-by-Step Guide
If you are learning reta peptide how to mix, following a structured workflow helps maintain consistency throughout laboratory research. If you are comparing Retatrutide vs Tirzepatide, understanding the differences between these peptides can also help provide broader research context before selecting a study protocol.
1. Allow Materials to Reach the Recommended Temperature
Before beginning, remove the peptide vial and bacteriostatic water from refrigeration if applicable.
Allow them to sit for several minutes until they reach the recommended handling temperature.
Avoid:
- Heating the vial
- Using hot water
- Microwaving
- Placing the vial in direct sunlight
Rapid temperature changes should be avoided because they may affect peptide stability.
2. Prepare the Vials
Remove the protective caps from both vials.
Using fresh alcohol swabs:
- Clean the peptide vial stopper.
- Clean the bacteriostatic water stopper.
- Allow both surfaces to air dry completely before inserting a needle.
Do not touch either rubber stopper after disinfection.
3. Draw the Bacteriostatic Water
Using a sterile mixing syringe, slowly withdraw the desired amount of bacteriostatic water.
The exact volume depends on your laboratory protocol and the concentration required for your research.
Researchers often choose the final concentration based on:
- Desired injection volume
- Measurement convenience
- Experimental consistency
- Laboratory documentation requirements
The important goal is maintaining an accurately known concentration throughout the study.
4. Add the Water Slowly
Insert the needle through the peptide vial stopper.
Instead of injecting directly onto the powder, aim the stream toward the inside wall of the vial.
This allows the liquid to flow gently over the powder rather than striking it with force.
A slow addition helps minimize:
- Foaming
- Air bubbles
- Mechanical stress
- Splashing inside the vial
5. Allow the Powder to Dissolve Naturally
Once the bacteriostatic water has been added:
- Remove the needle.
- Leave the vial undisturbed for several minutes.
- Allow the powder to hydrate naturally.
Most peptides dissolve without requiring vigorous movement.
If necessary, gently rotate or swirl the vial.
Never shake it.
6. Inspect the Solution
Before continuing, examine the solution carefully.
A properly reconstituted peptide should generally appear:
- Clear
- Colorless
- Uniform
- Free from visible particles
If the solution remains cloudy or contains unexpected material, do not proceed until the cause has been identified according to laboratory procedures.
Common Mixing Mistakes to Avoid
Many handling problems occur during reconstitution rather than injection.
The following table summarizes mistakes that can compromise peptide preparation.
| Mistake | Why It Should Be Avoided |
| Shaking the vial | May create excessive foam and unnecessary mechanical stress. |
| Injecting water directly onto the powder | Can disturb the peptide unnecessarily. |
| Touching disinfected stoppers | Increases contamination risk. |
| Using non-sterile water | May introduce microorganisms into the solution. |
| Reusing needles | Reduces sterility and increases contamination risk. |
| Leaving the mixed peptide at room temperature for extended periods | May reduce long-term stability. |
Careful preparation helps maintain solution quality throughout the storage period.
Choosing the Right Amount of Bacteriostatic Water
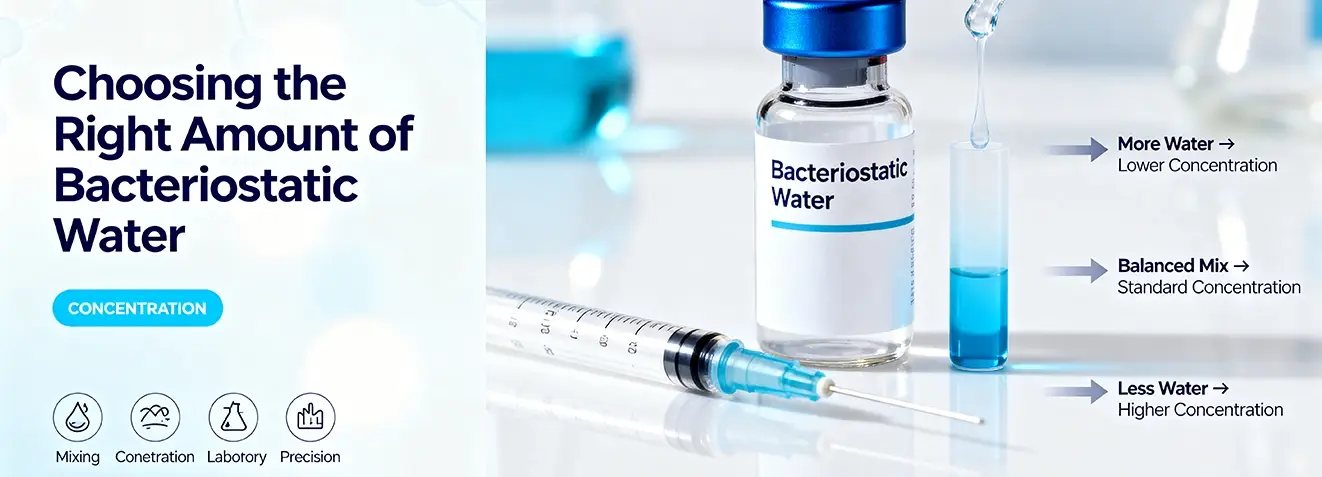
One of the most common questions about reta peptide how to mix is how much bacteriostatic water to add. The correct volume depends on the desired concentration, as the amount of water changes the concentration—not the total amount of Reta peptide contained in the vial.
The examples below illustrate how changing the amount of bacteriostatic water affects concentration while keeping the peptide amount constant.
| Peptide Amount | More Water Added | Less Water Added |
| 10 mg | Lower concentration | Higher concentration |
| 20 mg | Lower concentration | Higher concentration |
| 30 mg | Lower concentration | Higher concentration |
Regardless of the chosen volume:
- The total peptide content remains unchanged.
- Only the concentration changes.
- Accurate documentation is essential for reproducibility.
This principle helps researchers prepare solutions that fit their preferred measurement workflow without altering the amount of peptide contained in the vial.
Understanding Peptide Concentration
Before learning how to inject reta peptide, it is important to understand concentration.
Concentration simply describes how much peptide is present within a specific volume of liquid.
The basic calculation is:
Concentration (mg/mL) = Total Peptide (mg) ÷ Total Liquid (mL)
Higher concentrations contain more peptide per milliliter, while lower concentrations contain less peptide per milliliter without changing the total peptide amount.
Preparing the Syringe
Once the peptide has been completely dissolved, the next stage is preparing the syringe. Although this appears straightforward, small mistakes can affect measurement accuracy.
The same careful preparation principles also apply when handling Tirzepatide peptide in laboratory protocols.
General preparation includes:
- Clean the vial stopper again if necessary.
- Use a new sterile insulin syringe.
- Draw air into the syringe equal to the intended liquid volume.
- Inject the air into the vial to help equalize pressure.
- Turn the vial upside down.
- Keep the needle tip submerged in the solution.
- Slowly withdraw the required volume.
Drawing the solution slowly helps reduce bubble formation and improves measurement precision.
Removing Air Bubbles
Small air bubbles are common when drawing peptide solutions.
Before injection:
- Hold the syringe vertically.
- Tap the barrel gently.
- Allow bubbles to rise toward the needle.
- Slowly adjust the plunger until the desired volume is reached.
Avoid forcing the plunger rapidly, as sudden movements may introduce additional bubbles.
Removing air bubbles helps improve measurement accuracy and reduces unnecessary injection volume variation.
How to Inject Reta Peptide
After the peptide has been successfully reconstituted and accurately measured, the solution is ready for subcutaneous administration according to the applicable research protocol.
The same sterile preparation principles used for reta peptide also apply to other research peptides, including Ipamorelin peptide.
Although individual laboratory procedures may vary, the general injection workflow follows consistent aseptic principles.
1. Prepare the Injection Site
Select an appropriate subcutaneous injection area.
Clean the skin using an alcohol swab and allow it to dry completely before injection.
Avoid injecting through wet alcohol because it may increase skin irritation.
2. Pinch the Skin
Using your free hand, gently lift a fold of subcutaneous tissue.
This helps position the needle within the fatty layer rather than deeper tissues.
3. Insert the Needle
Insert the insulin needle smoothly into the subcutaneous tissue using the technique specified by your laboratory or clinical protocol.
Avoid sudden movements or repeated needle repositioning.
4. Inject Slowly
Depress the plunger slowly and steadily.
A slow injection helps deliver the solution consistently while minimizing unnecessary tissue discomfort.
5. Wait Briefly
Once the syringe is empty, leave the needle in place for several seconds before withdrawing it.
This may help reduce solution leakage from the injection site.
6. Remove and Dispose
Withdraw the needle carefully.
Dispose of the syringe immediately in an approved sharps container.
Never reuse insulin syringes or needles.
Recommended Subcutaneous Injection Sites
Selecting an appropriate injection site helps promote consistent absorption while reducing localized irritation. In research and clinical settings, reta peptide is typically administered by subcutaneous injection, meaning the solution is delivered into the fatty tissue beneath the skin rather than into muscle or a vein.
Common injection sites include:
| Injection Site | Advantages | Considerations |
| Abdomen | Consistent absorption and easy access | Stay at least 2 inches (5 cm) away from the navel |
| Front or Outer Thigh | Convenient for self-administration | Rotate between left and right thighs |
| Back of the Upper Arm | Alternative site | May require assistance depending on technique |
Regardless of the selected location, rotating injection sites is considered good practice. Repeatedly injecting into the same area may increase the likelihood of localized irritation or tissue changes over time.
Injection Site Rotation Tips
To support consistent tissue health:
- Alternate between different injection areas.
- Avoid injecting into bruised, swollen, or irritated skin.
- Do not inject through scars or damaged tissue.
- Record previous injection sites if following a structured research protocol.
Storage After Reconstitution
Proper storage is just as important as proper preparation. Once reta peptide mixing instructions have been followed and the solution has been prepared, storage conditions play a significant role in maintaining peptide quality.
1. General storage recommendations include:
- Refrigerate the reconstituted peptide according to supplier recommendations.
- Protect the vial from direct sunlight.
- Keep the vial upright when practical.
- Minimize unnecessary handling.
- Return the vial to refrigeration promptly after use.
2. The exact storage duration depends on several factors, including:
- The diluent used during reconstitution.
- Manufacturer or supplier recommendations.
- Laboratory handling practices.
- Sterility throughout the preparation process.
Always consult the product documentation provided with the peptide rather than relying on generalized storage timelines.
Before Reconstitution vs. After Reconstitution
| Stage | General Handling Recommendation |
| Lyophilized powder | Store according to supplier recommendations before mixing |
| Reconstituted solution | Refrigerate promptly and protect from light |
| During transport | Minimize exposure to excessive heat |
| During handling | Keep exposure to room temperature as brief as practical |
Avoid repeated warming and cooling cycles, as temperature fluctuations may gradually affect peptide stability.
Maintaining Sterility Throughout Handling
Whether learning how to use reta peptide powder or reviewing how to inject reta peptide, sterile preparation should remain a priority from beginning to end.
Simple practices that support aseptic handling include:
- Washing hands before preparation.
- Using new sterile syringes and needles.
- Cleaning vial stoppers with alcohol before each puncture.
- Avoiding contact with sterile needle tips.
- Keeping preparation surfaces clean.
- Disposing of used needles immediately after use.
Sterility protects both the peptide solution and the integrity of scientific investigations.
Best Practices for Consistent Peptide Handling
Researchers often follow standardized workflows to improve repeatability across experiments.
Good laboratory practices include:
- Label every vial after reconstitution.
- Record preparation dates.
- Document concentration calculations.
- Maintain organized storage.
- Use the same measurement procedures throughout a study.
- Verify calculations before preparing each syringe.
- Inspect the solution before every use.
Consistency is one of the most important principles in peptide research.
Safe Handling and Injection Practices
Understanding how to inject reta peptide also means understanding the importance of responsible handling practices.
Because reta peptide is commonly supplied for research purposes, preparation and administration should always follow:
- Applicable laboratory procedures.
- Supplier handling recommendations.
- Institutional safety guidelines.
- Local regulatory requirements.
General safety principles include:
- Never use a solution that appears cloudy or contains visible particles.
- Do not use damaged vials.
- Avoid contamination throughout preparation.
- Dispose of sharps safely.
- Store peptides according to manufacturer recommendations.
Research peptides should only be handled within appropriate research environments by individuals familiar with sterile laboratory procedures.
Final Thoughts on How to Inject Reta Peptide
Understanding how to inject reta peptide involves more than the injection itself.
Proper preparation includes understanding how to use reta peptide powder, following accurate reta peptide mixing instructions, and using proper subcutaneous injection techniques.
From reconstitution to storage and subcutaneous injection, every step supports consistent research outcomes and helps preserve peptide quality.
FAQs About How to Inject Reta Peptide
How to inject retatrutide?
Reconstitute the peptide first, then administer it as a subcutaneous injection following your research protocol.
Where is the best place to inject reta?
The abdomen, thigh, and upper arm are the most common subcutaneous injection sites.
Can I inject reta in my glutes?
The glutes are not typically recommended because reta peptide is usually administered into subcutaneous tissue in the abdomen, thigh, or upper arm.
Where should you not inject peptides?
Do not inject into bruised, scarred, infected, swollen, or irritated skin.
How to mix reta and BAC water?
Slowly add bacteriostatic water down the inside wall of the vial and gently swirl until the powder fully dissolves.
How much BAC water do I mix with my peptide?
The amount depends on the desired final concentration and your laboratory protocol.
How much BAC water for 20 mg retatrutide?
The volume varies according to the target concentration, so follow your laboratory protocol or supplier guidance.
How often do I inject reta peptide?
In many research protocols, reta peptide is evaluated as a once-weekly subcutaneous injection.
How to inject peptides for beginners?
Use sterile equipment, inject into subcutaneous tissue, and rotate injection sites regularly.
How long does retatrutide take to kick in?
Retatrutide is a long-acting peptide that produces gradual effects over several weeks rather than immediately.
Can you inject reta peptide intramuscularly?
No. Research protocols generally evaluate reta peptide using subcutaneous administration rather than intramuscular injection.
Sources:
https://pubmed.ncbi.nlm.nih.gov/41090431/
https://www.lilly.com/news/stories/what-to-know-about-retatrutide